JK-Desktop
| JK-Desktop and JK-Database Analyzer are out-dated, please contact the Author to discuss the upgrade plan. |
Build Java Desktop application Rapidly as never before.
Full Working Example
|
Full Source code available at GitHub |
This article presents details of developing a simple Human Resource(HR) management system based on Smart-EIS framework. This system is assumed to be able to manage basic employee’s information for profiling purposes. In addition, the system shall support three user roles:
-
System Admin: who shall manage the system security and create database backups
-
HR Manager: who shall be able to manage the system HR configurations, such as job-titles and departments,
-
HR Officer: who shall handle the daily work of HR management, such as input and maintain employee’s data.
Figure 1 shows the use-case diagram to clarify the high-level requirements of the HR system.
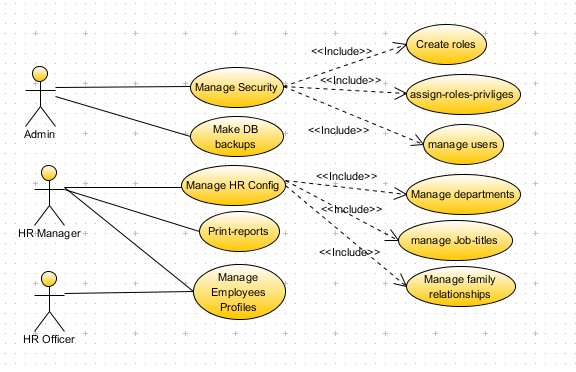
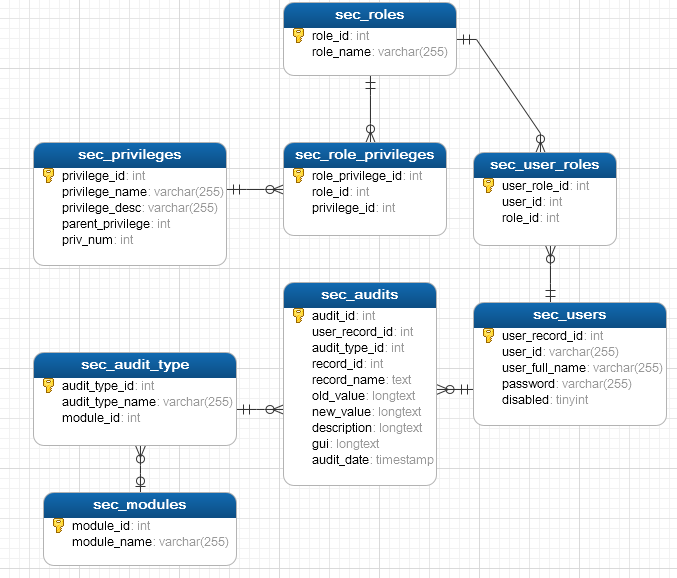
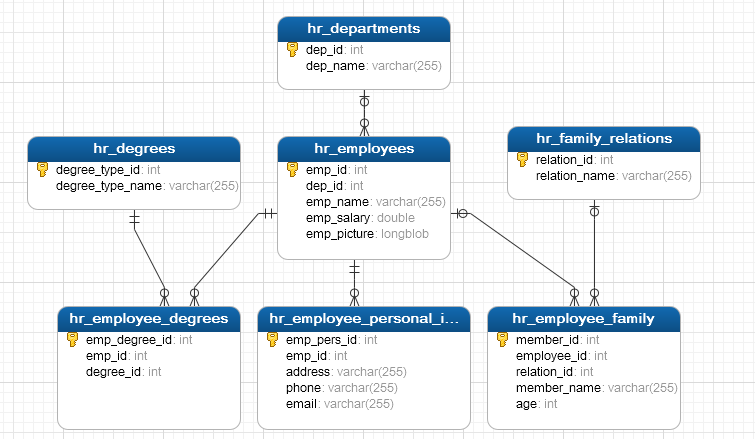
Figure 2 and Figure 3 show the entity-relationship diagram of the HR system, which shall contain two parts, one for the security and the other for the HR business logic.
In order to develop the HR system using Smart-Desktop, the following steps shall be performed:
-
Create a database physical structure for the business domain tables only. There is no need for security tables since they are already bundled in Smart-EIS.
-
Add only one single dependency to a new maven project, as the following:
<!-- https://mvnrepository.com/artifact/com.jalalkiswani/smart-eis-desktop -->
<dependency>
    <groupId>com.jalalkiswani</groupId>
    <artifactId>smart-eis-desktop</artifactId>
    <version>0.0.9-6</version>
</dependency>
3.Use src/main/resources/meta/menu.xml file that contains the following sections:
<main-menu>
<menu name="HR Config">
<menu-item name="Departments">
<properties>
<property name="table-meta" value="hr_departments" />
</properties>
</menu-item>
<menu-item name="Degrees">
<properties>
<property name="table-meta" value="hr_degrees" />
</properties>
</menu-item>
<menu-item name="Family releationships">
<properties>
<property name="table-meta" value="hr_family_relations" />
</properties>
</menu-item>
</menu>
<menu name="HR Management">
<menu-item name="Employees ">
<properties>
<property name="table-meta" value="hr_employees" />
<property name="detail-tables" value="hr_employee_personal_info,hr_employee_degrees,hr_employee_family" />
<property name="detail-fields" value="emp_id,emp_id,emp_id" />
<property name="cross-table" value="false,true,false"/>
</properties>
</menu-item>
</menu>
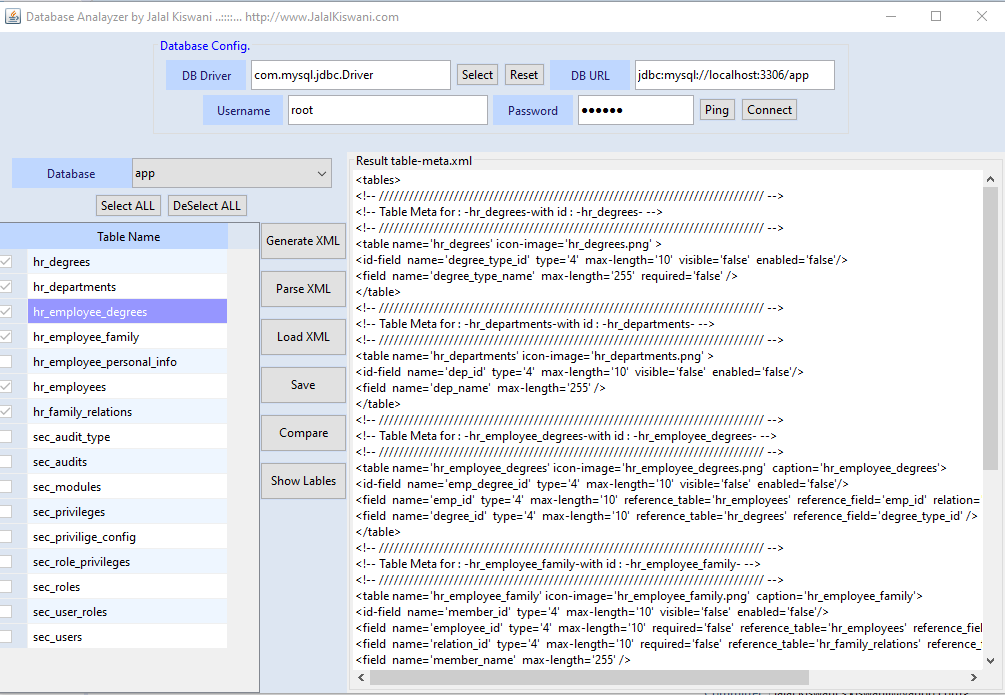
</main-menu>4.Use the Database Analyzer to create src/main/resources/meta/meta.xml, as seen in Figure 4
5.Create a main class as the following:
package com.jalalkiswani.demo;
import com.jk.framework.application.ApplicationManager;
public class SmartEISDemo {
public static void main(String[] args) {
ApplicationManager.getInstance().start();
}
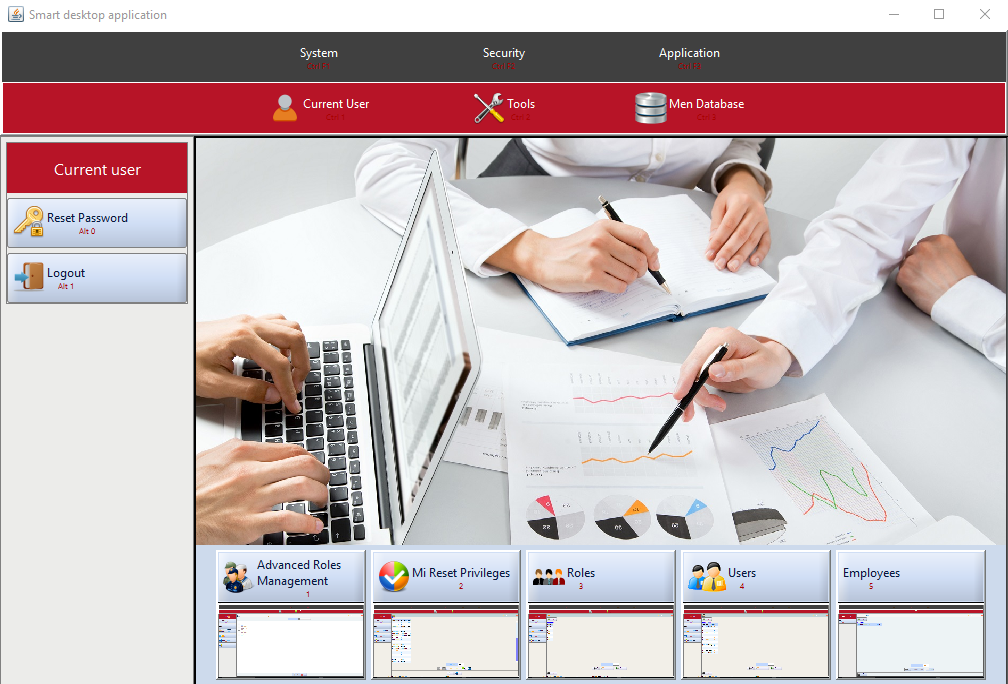
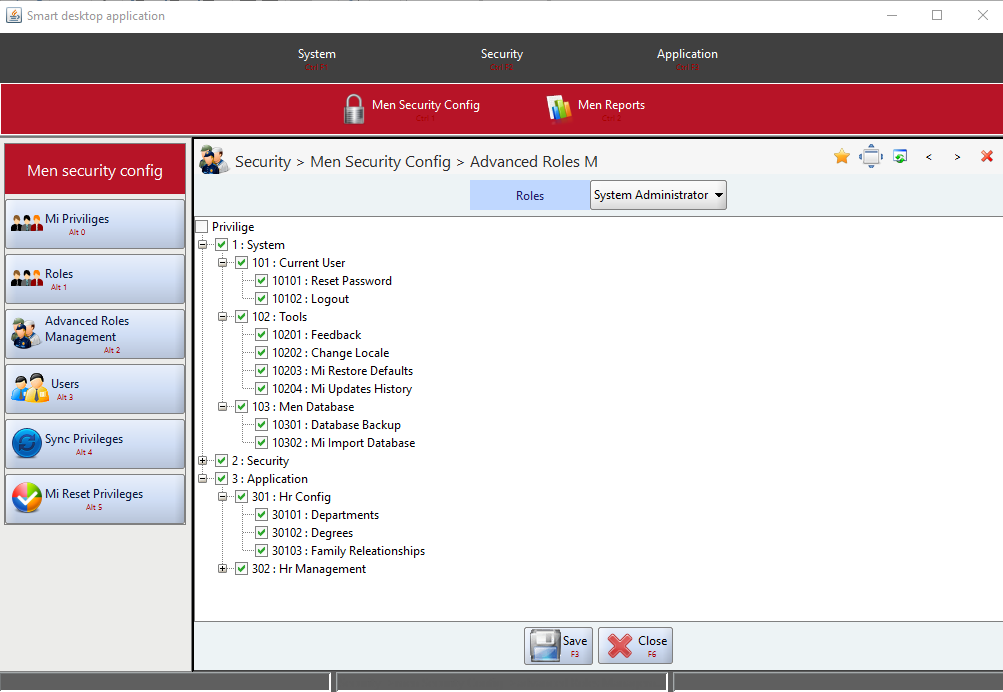
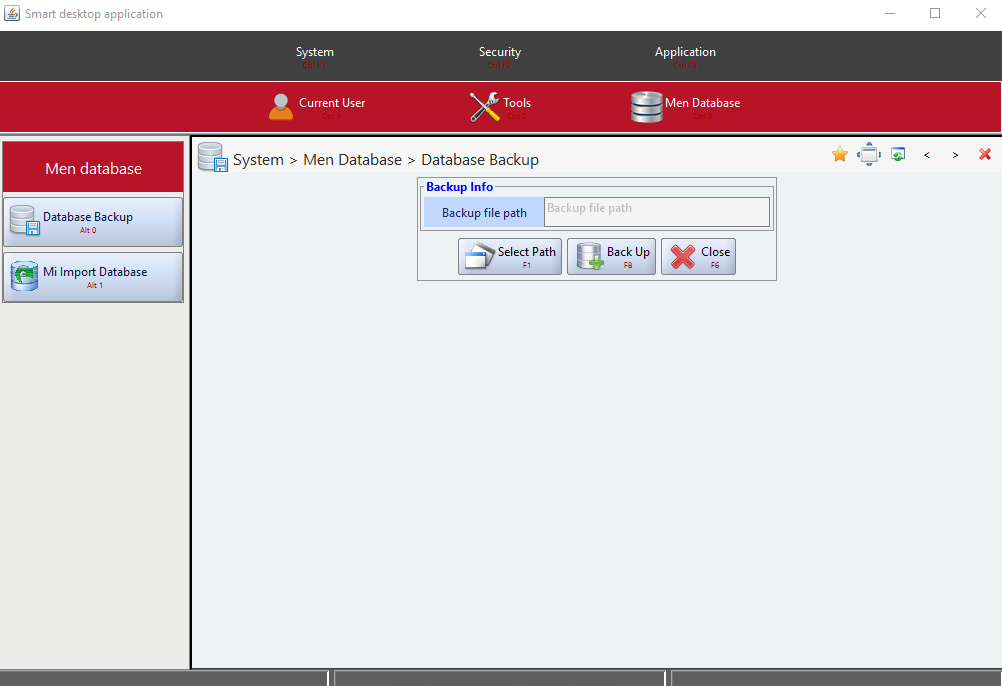
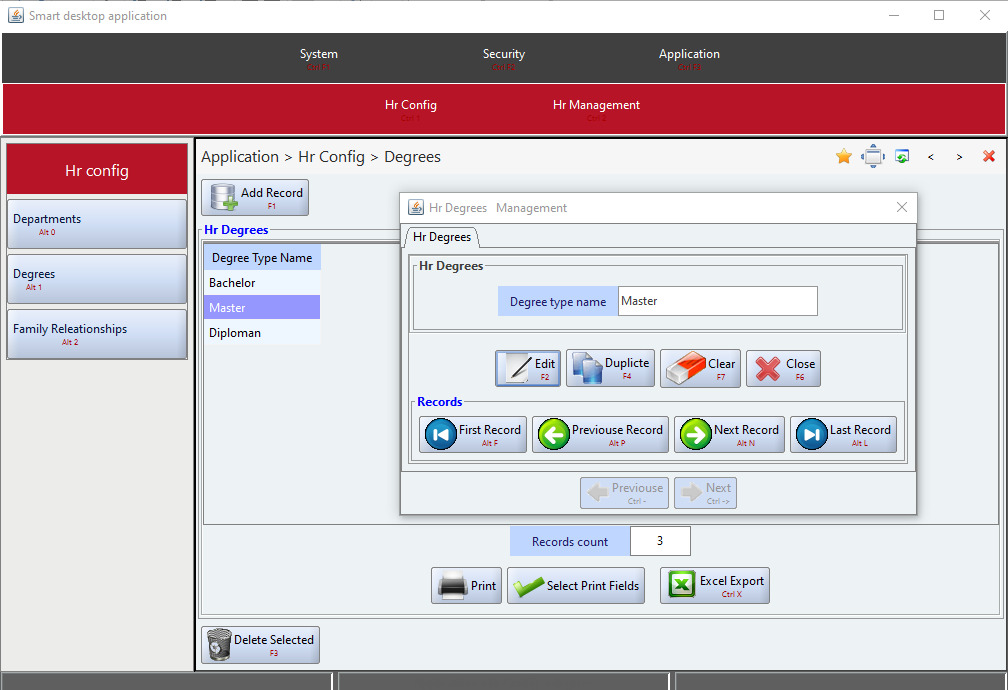
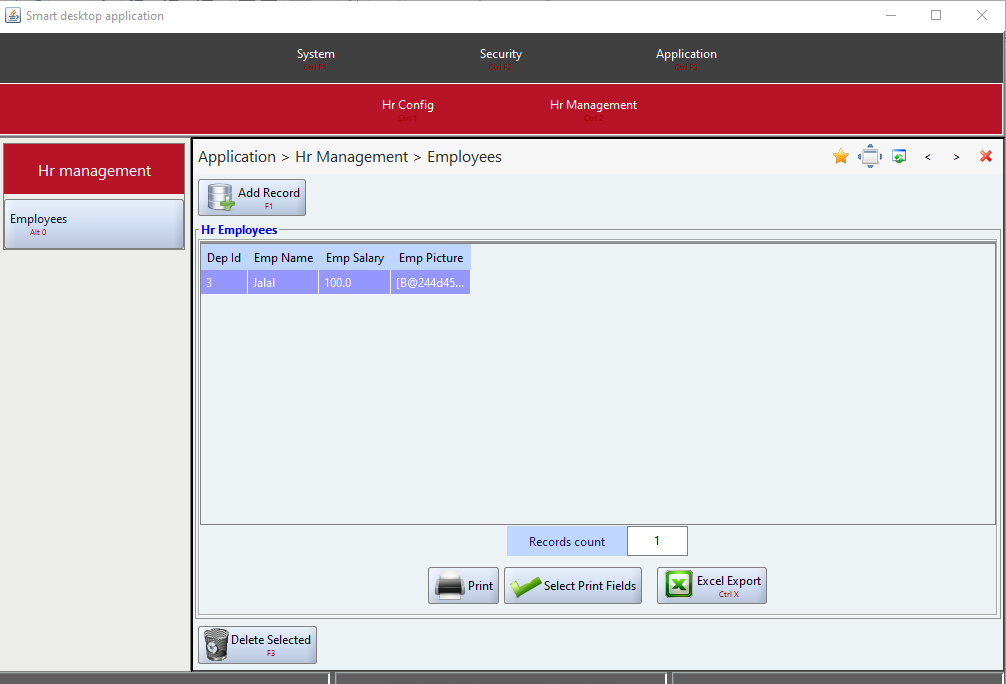
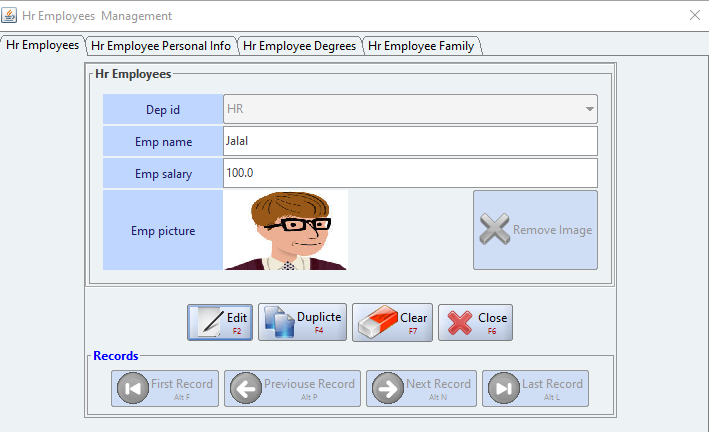
}These were the only steps needed to build the HR system and have it ready to be run. Figures 5 through 11 to show screen shots samples of the dynamically generated user interface views of the HR system. All these views and their related front-end as well as back-end functionalities had been dynamically generated by Smart-EIS framework.
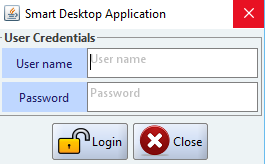
Figure 5: Log-in Dialog